Slave Zone (Management Console, deprecated)
Through this function, you create a slave zone.
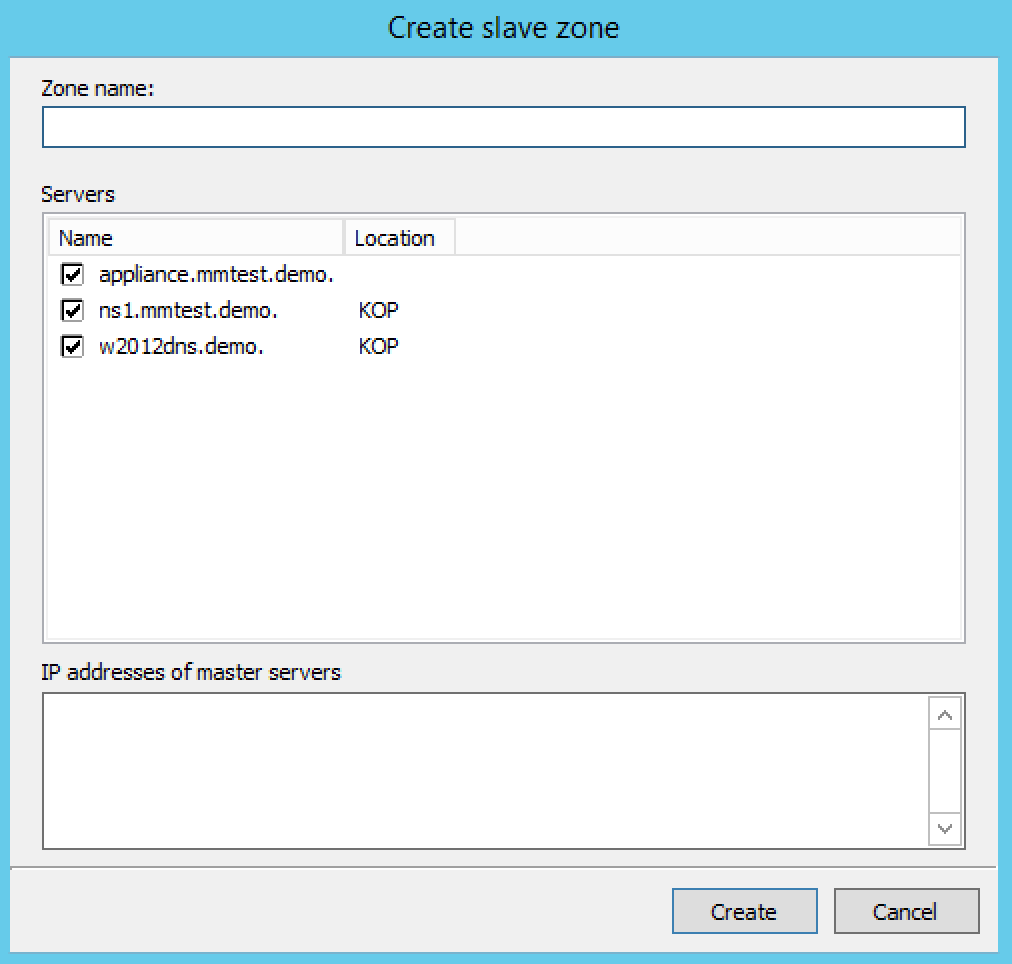
In the Object List, right-click on DNS Zones and, from the shortcut menu, select New Slave Zone. The Create slave zone dialog box displays.
In the Zone name field, type the name for this slave zone.
In the Servers list, click all the servers to which this slave applies.
In the IP Addresses of master servers, click in the field, and type the IP Address of any master servers for this zone.
When all selections/entries are made, click Create. The new slave zone is created and displays in the Detail View of the main window.
Slave Server Assignments
Use the following procedure to assign a slave server to a particular zone so it will always work from the context of the zone.
In the Object Section, under DNS Servers, select the name server containing the zone to which you want to assign a slave server.
In the Object List, right-click on the zone to which you want to assign the slave server.
From the shortcut menu, select Add slave server.
Choose the desired slave server from the submenu that displays. That zone now displays as a slave on the server that was specified.
