For detailed information on the preferred method of access management, see Access control.
Managing access control in the Management Console
Access control management in the Management Console uses the new access control model, but its features are slightly different than those available in the Web Application.
Note
Men&Mice recommends configuring and managing access through the Web Application, as the preferred method. Functionality in the Management Console is mostly implemented in a transitional capacity.
Key differences between the Web Application and the Management Console
Effective access
In the Management Console’s , the functionality for Effective access is not available.
Users and groups
In the Management Console’s , users and groups cannot be edited to assign roles. Instead, roles need to be configured with users and groups.
Roles
In the Management Console’s , adding a new role doesn’t allow configuring access for it.
Configuring access in the Management Console
Adding a new role
Open and switch to the Roles tab.
Click Add.
Fill in the name and description for the role. Optionally, you can add users and groups to the role.
Click Ok.
Important
The function for creating the role doesn’t contain options to set access for it in the Management Console. For configuring access, follow the steps in Configuring access for a role.
Configuring access for a role
Note
Unlike the in Web Application, configuring access for roles is sectioned by object type (i.e. DNS servers, zones, clouds, etc.).
Open and select the object type from the menu.
Note
To manage access for Micetro (module access, setting user admins, etc.) use .
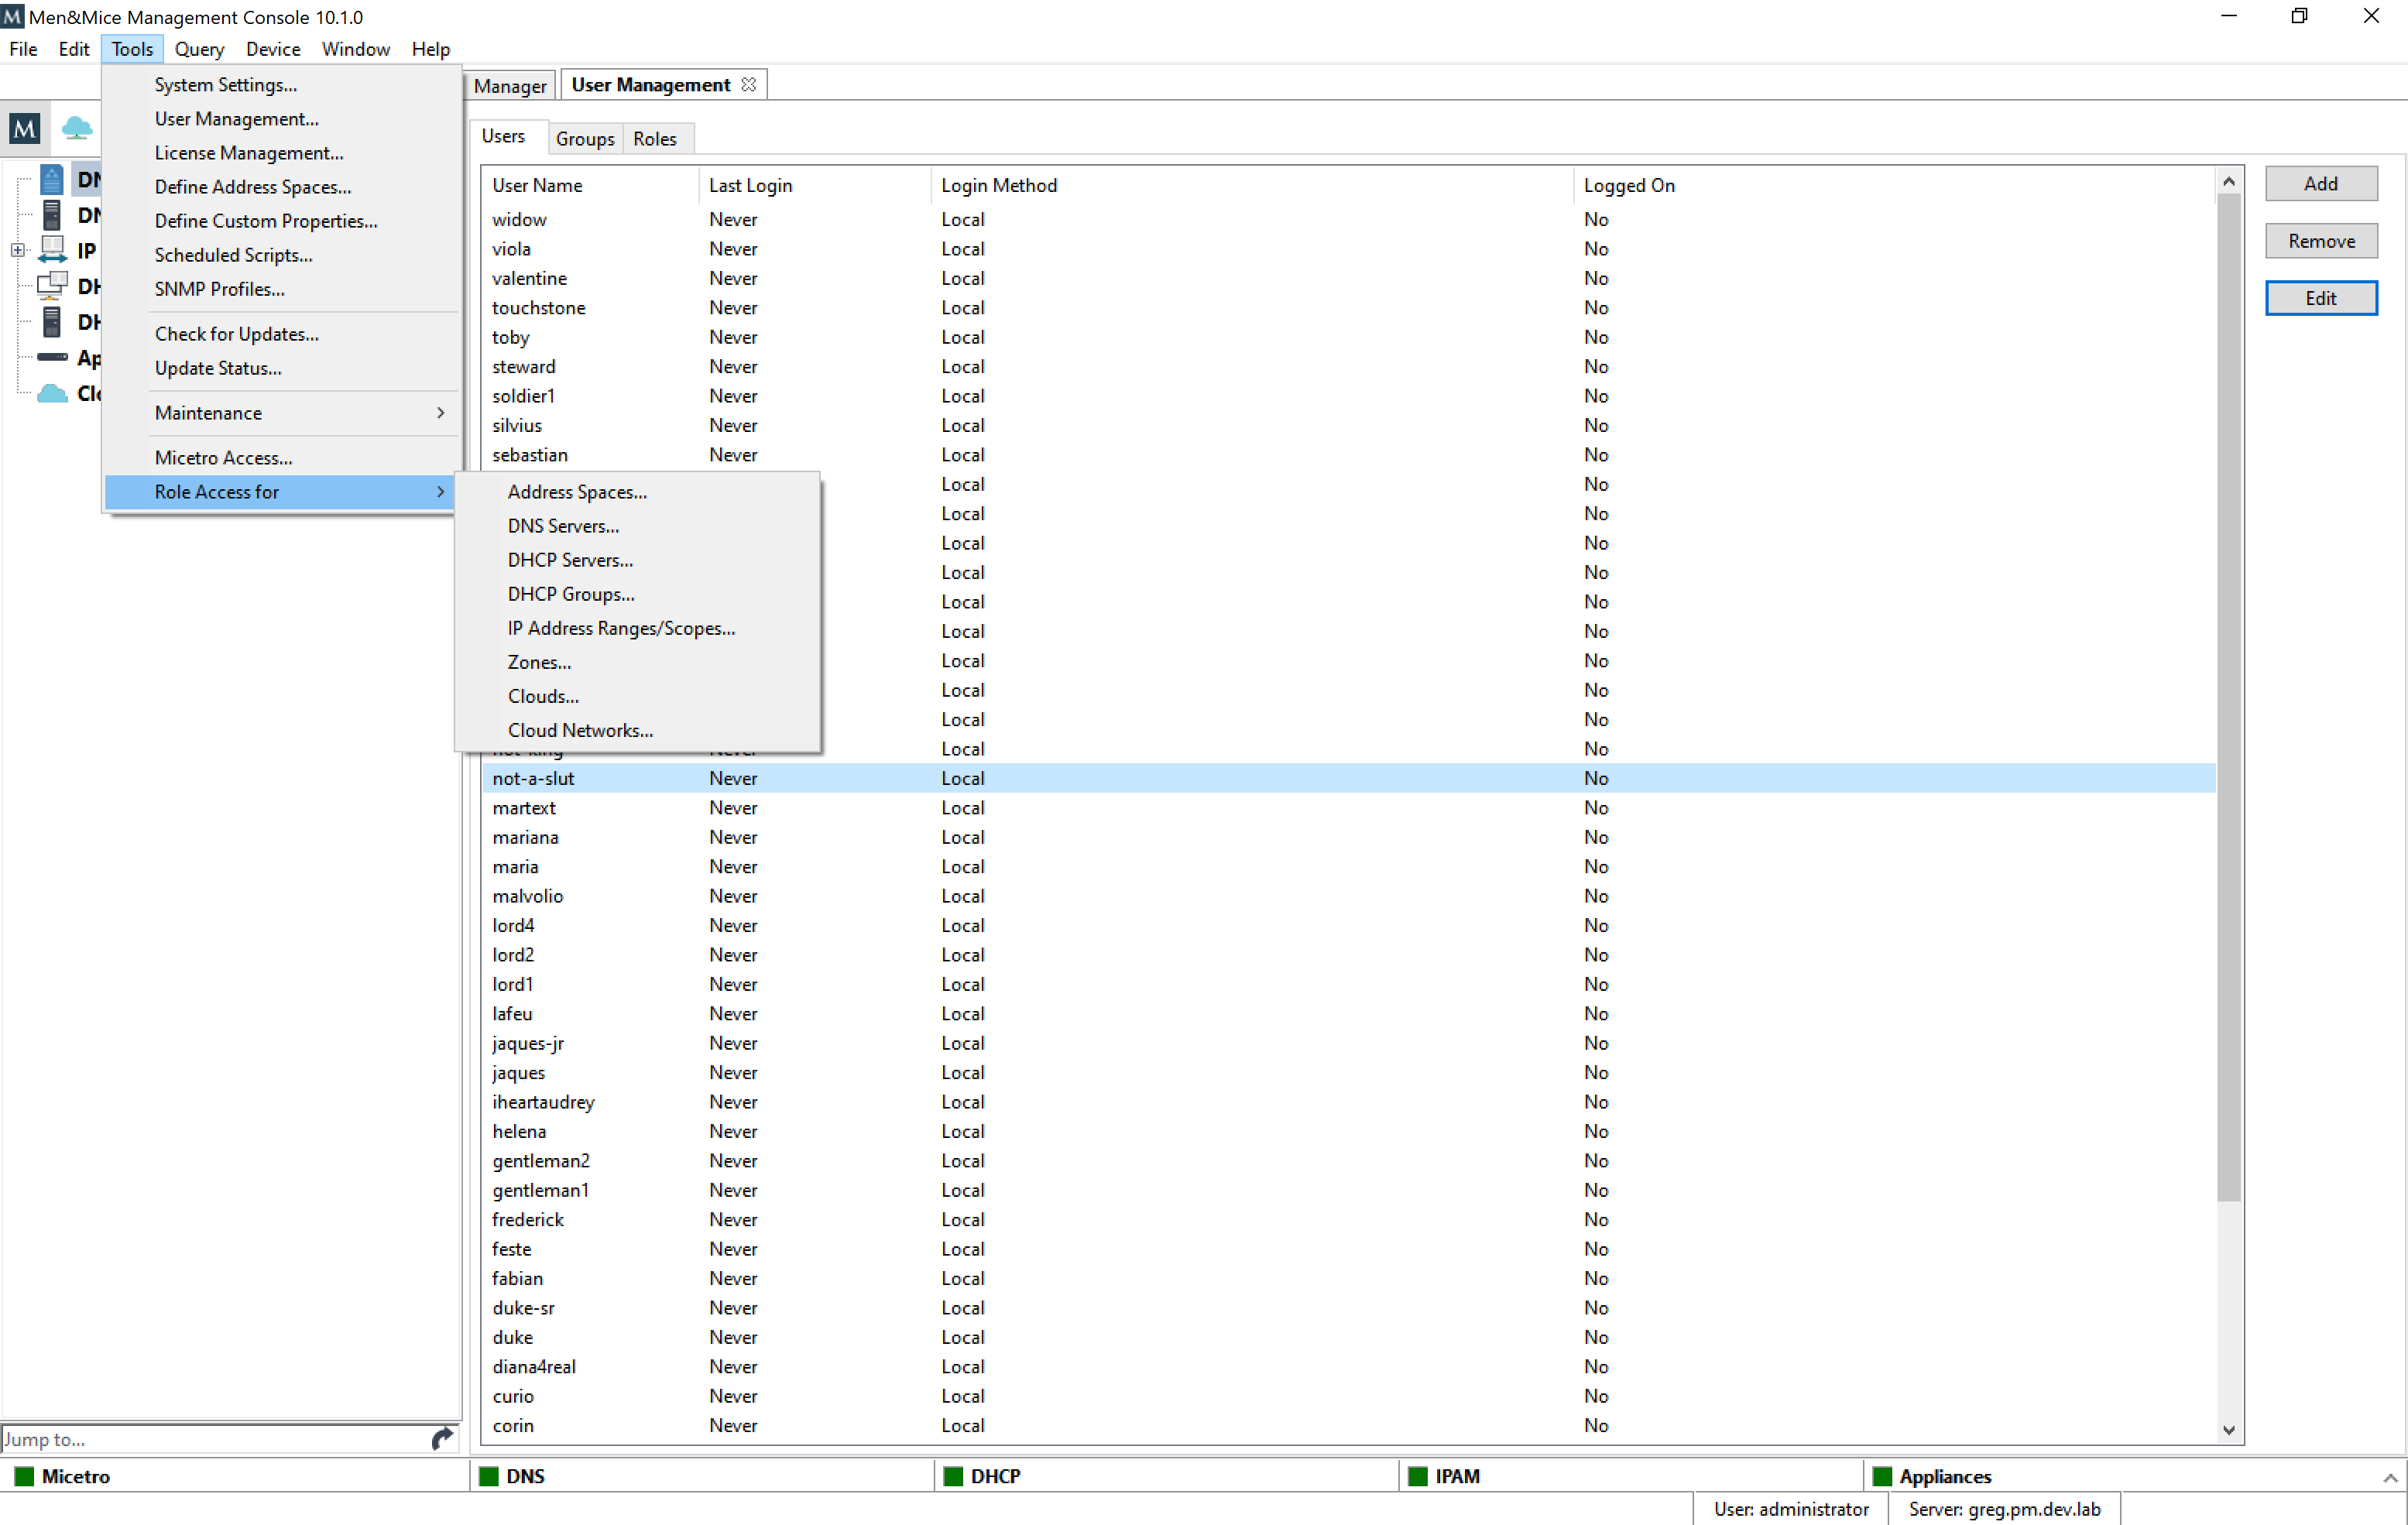
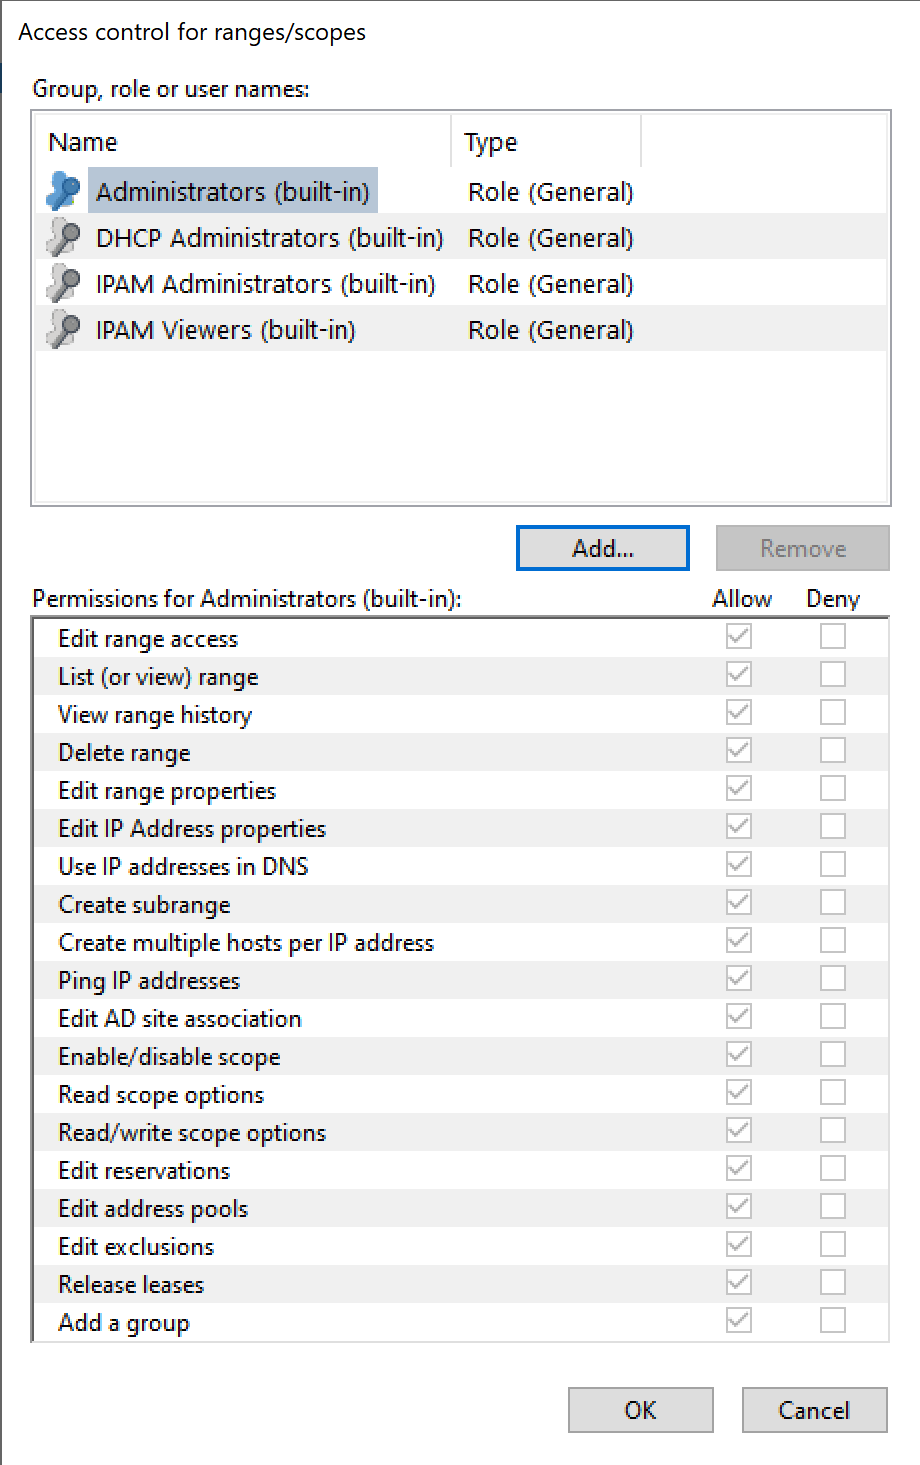
In the Access control dialog, you’ll see all roles that have relevant access configured on them.
To configure access for the selected object type to a role:
3/1. Select the role in the top window, or click Add… to add a role that doesn’t have access configured for the object type yet.
3/2. In the bottom panel, select all checkboxes for the access permissions you’d like to enable.
Note
Selecting Deny is the equivalent of Block in the Web Application. See Block permission for more details. Setting ‘deny’ on a permission will block any other role to overwrite this setting.
Click OK when all the desired access permissions are set.
Removing a role
To remove a role’s access permissions from an object type use the menu. Select the role in the top panel and click on Remove. This will remove all configured access permissions from the role, but not the role itself.
To remove a role from Micetro use and click on the Roles tab. Select the role(s) to remove, and click Remove. This will remove the role and all its configured access permissions from Micetro completely.
Adding users and groups to a role
To add users or groups to a role:
Open .
Select the user(s) and/or group(s), click Edit and in the bottom panel select the roles to attach the user(s)/group(s) to.
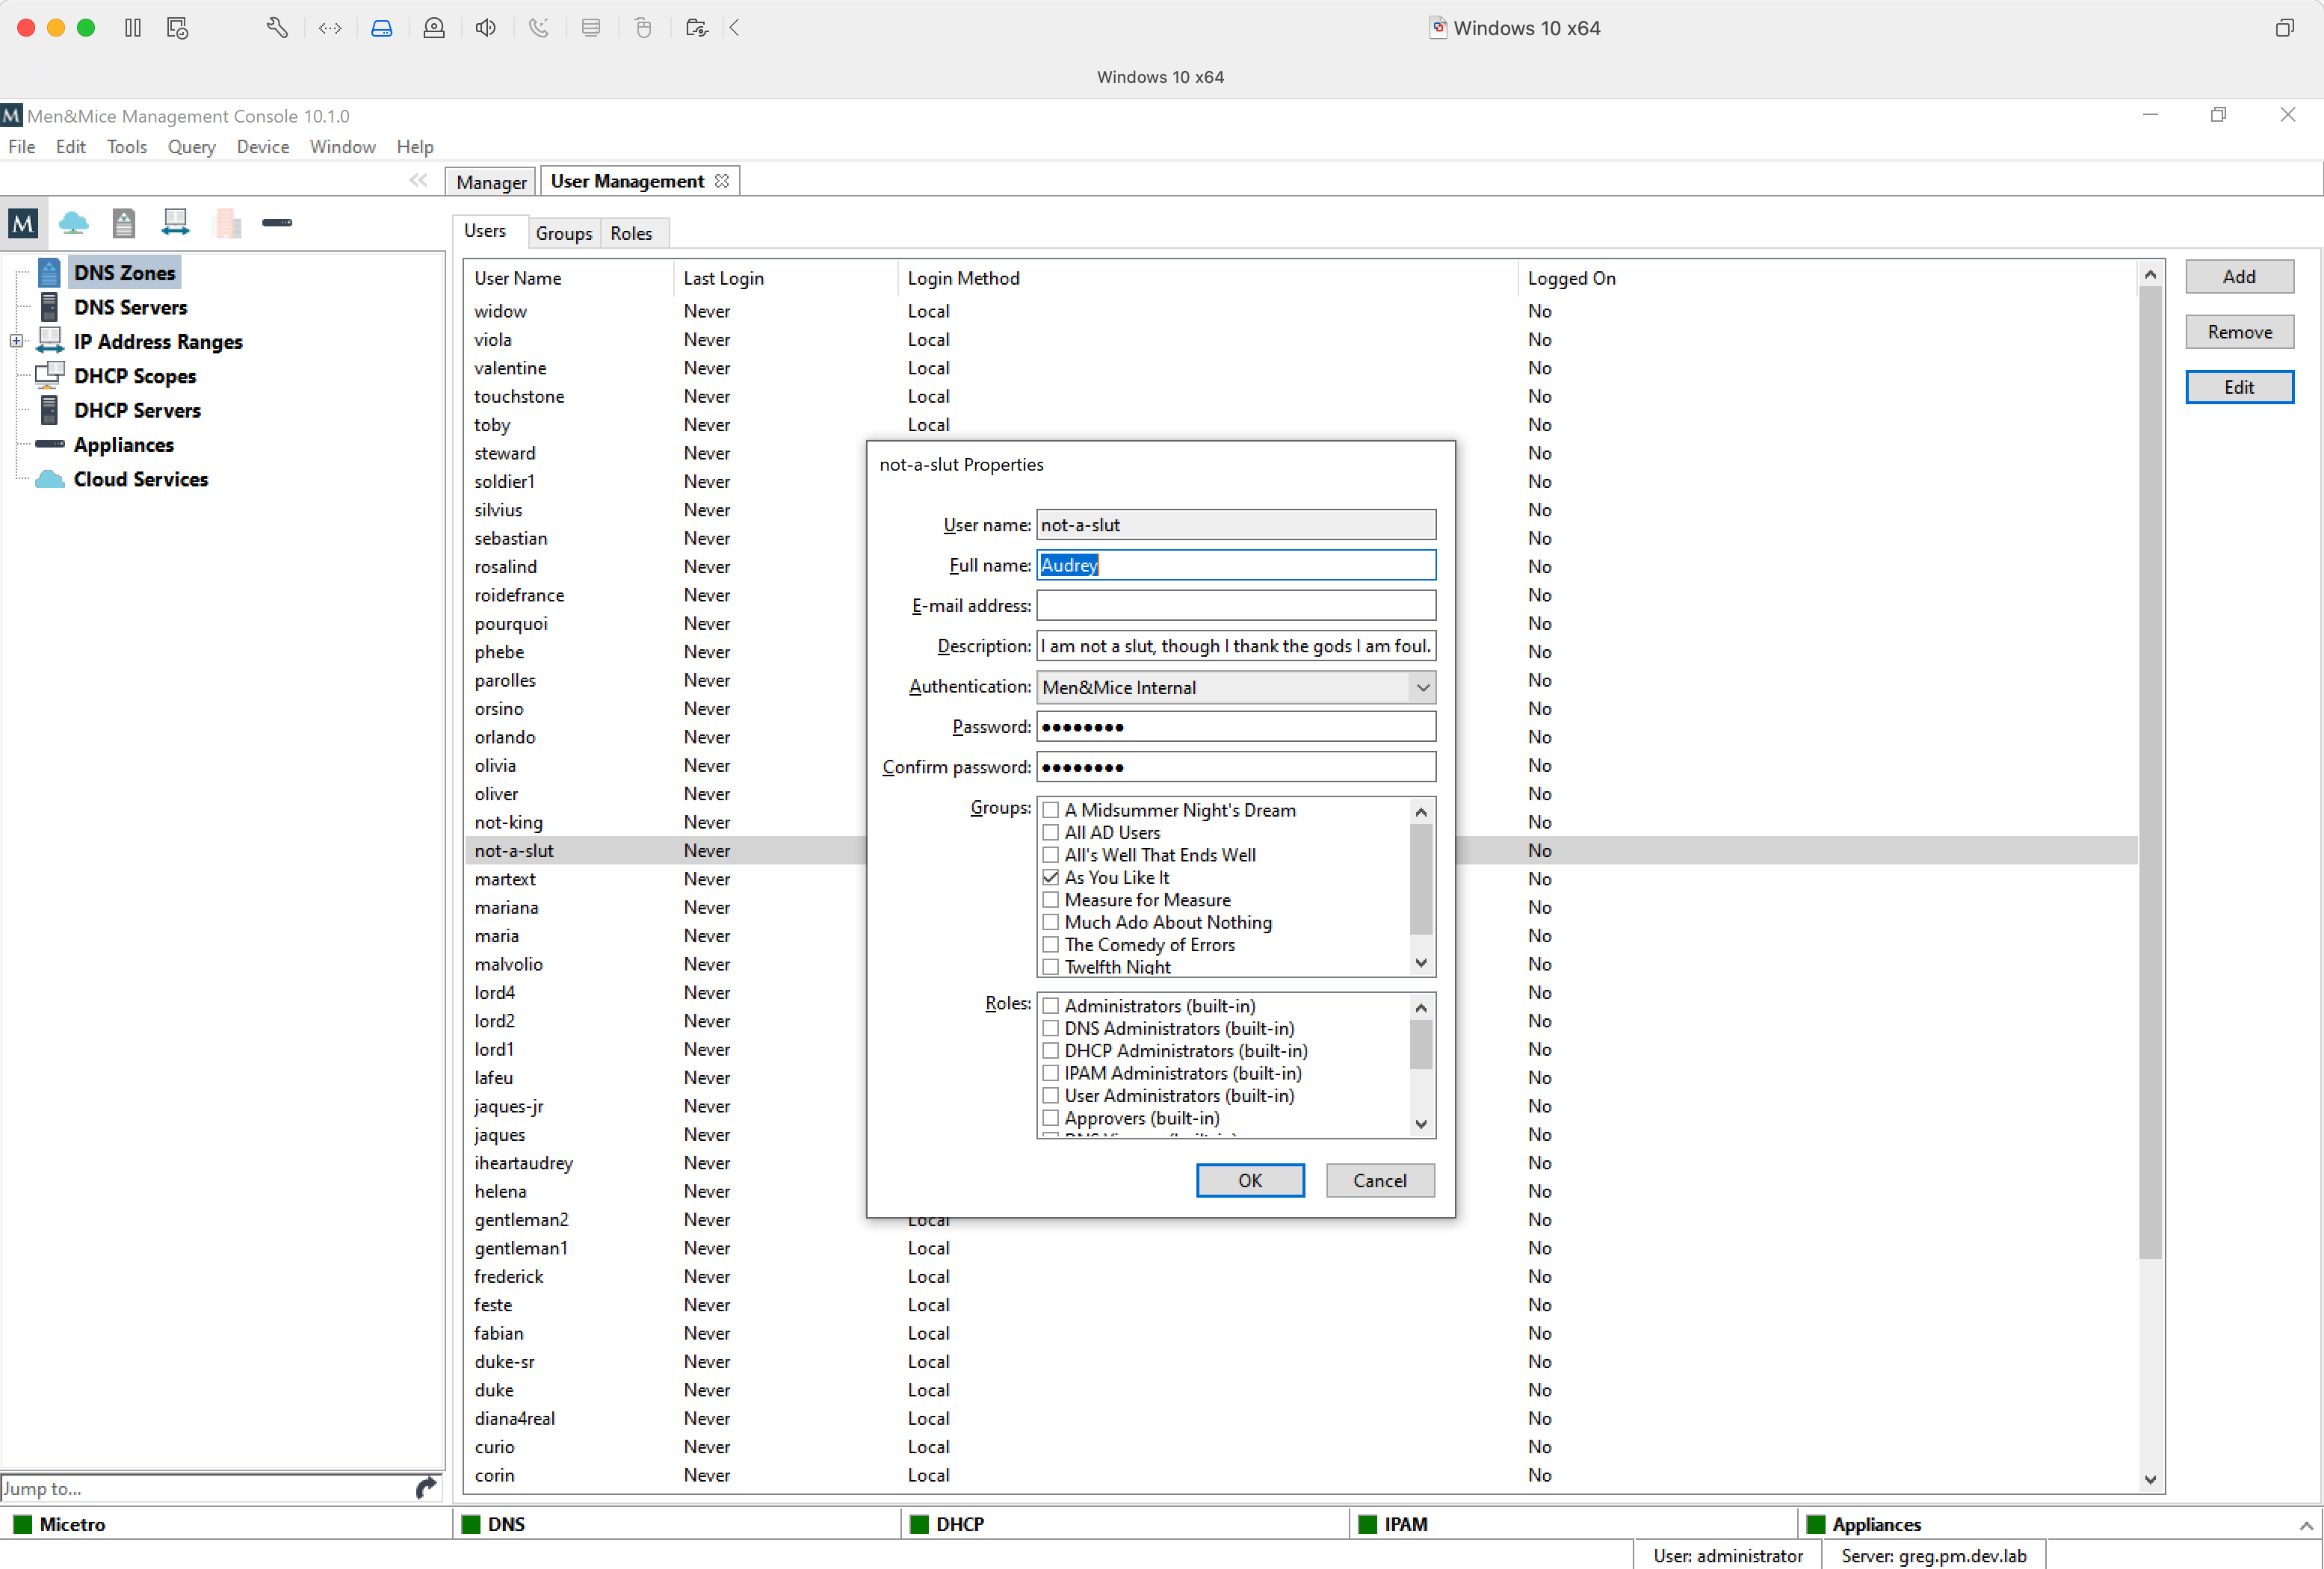
Click OK to save the new membership settings.
Note
Using the Roles tab of , examining a role will display the users and groups attached to the role, but cannot be used for adding users/groups to it.