Cloud Integration
Micetro provides native integration with cloud-based DNS services and can manage IP address-related data for Azure and AWS, including virtual networks and subnets that exist in cloud accounts.
Using a cloud DNS service in Micetro is similar to the process of working with other DNS services. The process of adding DNS zones, DNS records, or modifying them is identical to that of other DNS servers in Micetro. It’s worth noting that, at present, cloud DNS services only support the creation of primary zones.
Supported Cloud Services
Important
To use cloud services, the DNS Server Controller must be installed on the same machine as Men&Mice Central. For information about how to install DNS controllers, see Micetro DNS Agents.
Cloud service |
DNS |
IPAM |
|---|---|---|
Akamai |
Yes (Akamai Fast DNS) |
N/A |
Azure |
Yes (Azure DNS) |
Yes |
Amazon Web Services (AWS) |
Yes (Amazon Route 53) |
Yes |
NS1 |
Yes |
N/A |
Setting Up Cloud Integrations
Prerequisites
For IP Address Management (IPAM), Micetro connects with the cloud service through Men&Mice Central, and for DNS management, the Men&Mice DNS controller is required. Before proceeding with any actions related to Micetro and its interaction with cloud services, two essential requirements must be met:
DNS Controller Installation and Setup:
Ensure that the DNS controller is installed on the machine where Men&Mice Central is running.
For instructions on installing DNS controllers, see Micetro Agents.
Network Connectivity:
Verify that the machine running Men&Mice Central can establish a connection to the specific cloud instance.
The connection should be established on port 443/TCP. This is a specific network port used for secure communication.
For detailed networking requirements, see Networking Requirements.
If you intend to add multiple AWS cloud accounts using a single set of credentials, see Configuring AWS Multi-Account Setup.
Adding Cloud Services
You must have permission to administer DNS to add a new service to Micetro.
To add a cloud service:
On the Admin page, select Service Management in the upper-left corner.
Select Add Service.
Select the cloud provider you want to use, fill in the required information, and select Add.
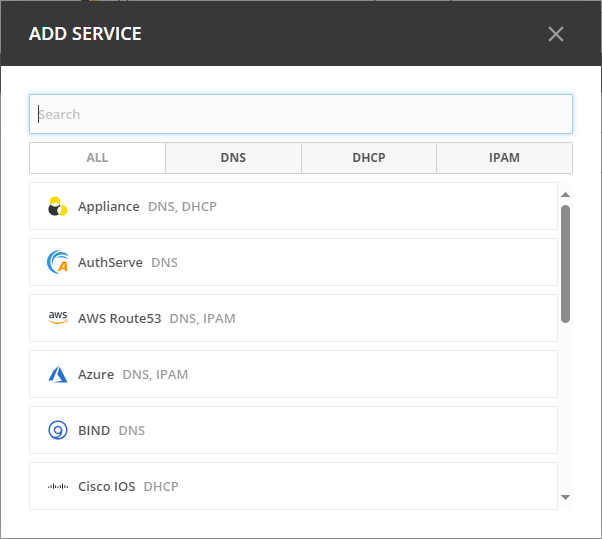
The DNS service and any subnets defined will be displayed under DNS Services and IP Ranges, respectively.
Akamai Fast DNS
Fill in the fields required to connect to Akamai Fast DNS:
Obtaining Access Credentials: For information about how to create API Access Credentials for Micetro, see https://developer.akamai.com/introduction/Prov_Creds.html
Warning
Akamai OPEN APIs are time sensitive! Ensure that the system your client runs on is synchronized to a Stratum 2 or better time source.
Danger
If the time on the server running the DNS Remote differs significantly from Coordinated Universal Time, authentication will fail preventing access/updating of zones through Micetro.
Azure DNS
Fill in the fields required to connect to Azure:

For information about how to configure Azure DNS, see Configure Azure DNS.
Amazon Web Services
Fill in the fields required to connect to AWS:
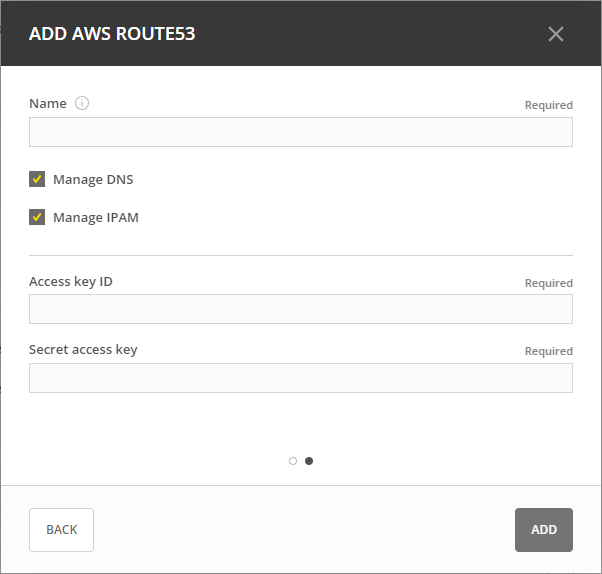
Obtaining Access Credentials: For information about how to create API Access Credentials for use by Micetro, see: https://docs.aws.amazon.com/general/latest/gr/managing-aws-access-keys.html
For information about how to add multiple AWS cloud accounts using single credentials, see: Configuring AWS Multi-Account Setup.
For information about the minimum permissions required for adding AWS accounts, see Integrating Cloud Services with Micetro: Permissions Guide for AWS.
NS1
Fill in the fields required to connect to NS1:
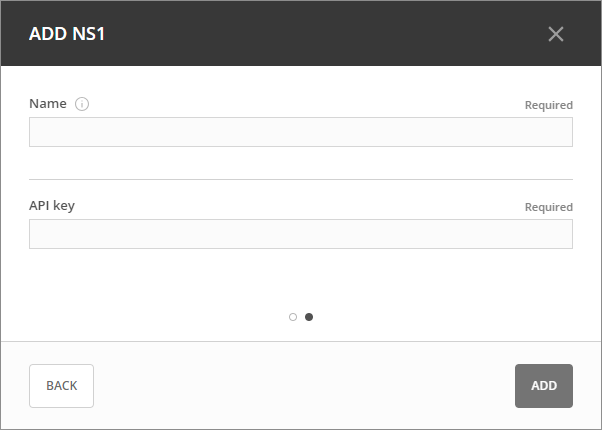
Obtaining Access Credentials: For information about how to create API Access Credentials for use by Micetro, see https://ns1.com/knowledgebase/creating-and-managing-api-keys.
Editing Cloud Services
To edit the properties of a cloud service:
In the Service Management area, locate the service you want to edit.
Double-click the service or select it, and then select Edit service on the Action menu.
Make the necessary changes and select Confirm.
Removing Cloud Services
Warning
By removing the cloud service, the associated DNS service and the corresponding zones will be removed. Additionally, any subnets and cloud networks will also be removed.
To remove a cloud service:
In the Service Management area, select the service you want to remove.
On the Action menu, select Remove DNS service.
Removing Cloud Networks
To remove a cloud network:
On the IPAM page, select the specific cloud network.
2. On the Action menu, select Delete network. | See also: