Adding DNS servers
After installation, the Men&Mice Suite contains no data about DNS servers. These need to be added through the Management Console.
DNS servers require Server controllers and need to be added using their fully qualified names (such as dns1.europe.ad.mmdemo.local).
Note
Servers in Microsoft Active Directory environments can be added without installing a server controller. See Agent-free management of DNS/DHCP servers.
To add a new DNS server the administrator will select File –> New –> DNS Server.
Log in to the Web Application
Select the Admin tab on the top of the screen
Click Add DNS server in the interface

The Add DNS server modal will display.
Fill in the server’s FQDN. Optionally, you can specify its IP address (IPv4 or IPv6).
Select the server type from the dropdown.
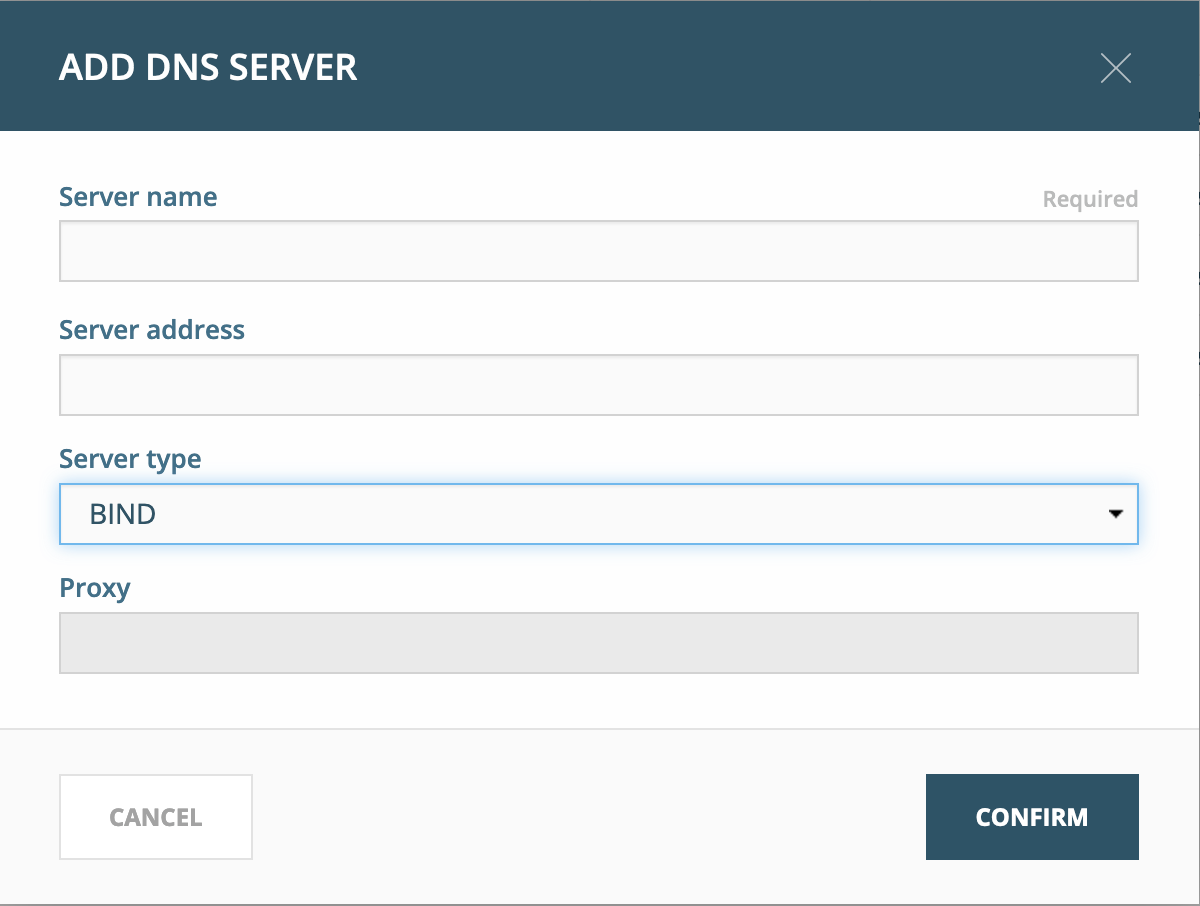
Click Confirm.
If the entered details are correct and the server is accessible, it will show up in the DNS view.
For further details on DNS management, refer to DNS.
DNS servers in Active Directory integrated zones
The DNS agent will use two different methods to retrieve information from Microsoft AD integrated zones. First it will do a zone transfer (both full and incremental) to get the latest records for the zone and then it will use Microsoft APIs to get detailed information for individual records. Due to this it is important that the DNS agent is allowed to do a zone transfer from the local server.
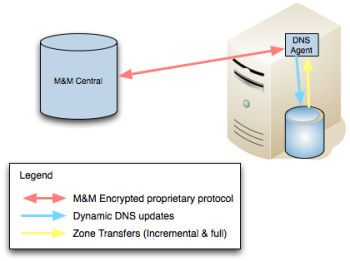
The DNS agent on the DNS server must be able to transfer AD integrated zones from the local DNS server.
There is a global setting in that allows the Suite to adjust the zone transfer settings for dynamic or AD integrated zones. It is enabled by default but the administrator can change this setting by selecting Tools –> System Settings in the Management Console, and switching to the DNS tab.