Master Zone (Management Console, deprecated)
This procedure is the fastest way to add a new blank (i.e., empty) zone. If you want to duplicate an existing zone, you should use the Duplicate command instead.
Note
It does not matter which server is currently selected when you add a zone. You always have the option to select the Master Server when you configure the zone.
In the Object Section, select either DNS Zones, or select a specific server under the DNS Servers object.
On the toolbar, click the New Zone button. The Create Zone dialog box displays.
To use the Create Zone Wizard from this dialog box, click the Assist me button and follow the instructions found under the section titled, “Zone Wizard.” If you chose not to use the zone wizard, continue with the steps below.
In the Zone Name field, type a name for the new zone.
In the Master server field, click the drop-down list, and select the server that you want to designate as the master for this zone. The Slave servers list automatically updates itself based upon your choice of the master server.
In the Slave server area, select the slave server(s) onto which you want to place this zone. The slave servers are selected by default, so if you do not want to assign this zone to a slave server, you must clear the associated checkbox. You can select or deselect all slave servers by right-clicking the list of slave servers in the dialog box for creation of master zones, and selecting the appropriate menu item.
If you want the zone to be an Active Directory Integrated zone, click the AD Integrated zone checkbox.
If the zone is Active Directory Integrated, the AD Replication button is enabled. Click this button to display a dialog box where you can set the AD Replication options for the zone.
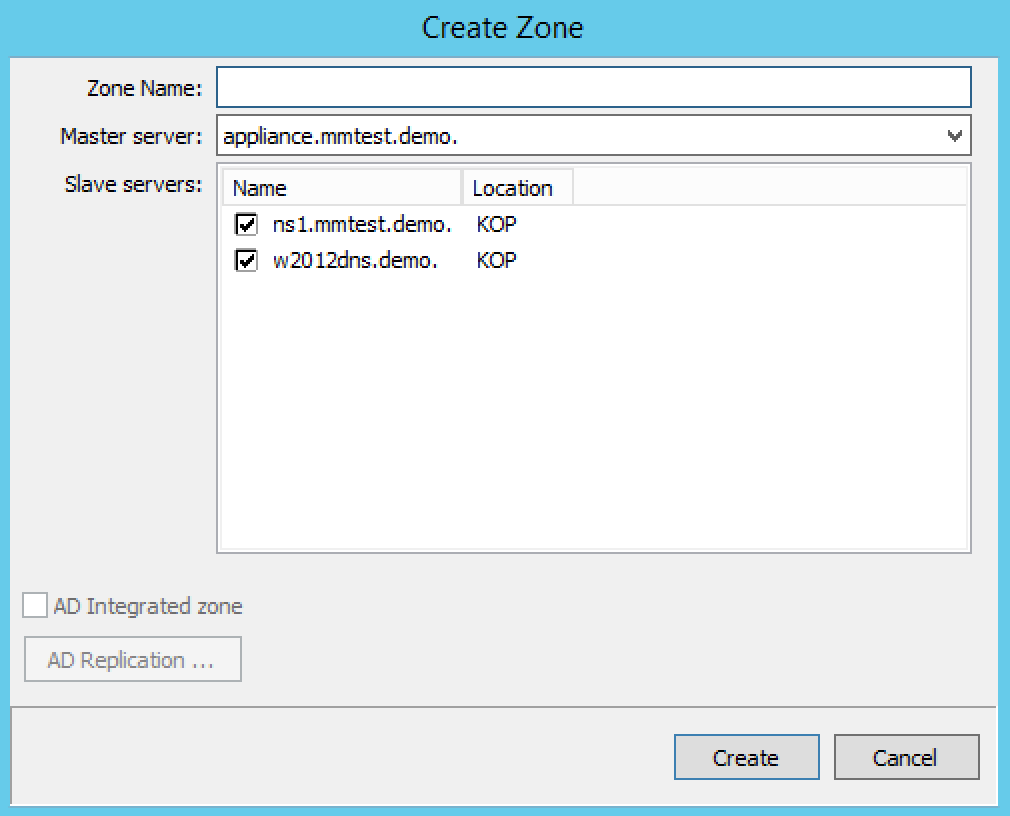
To finish creating the zone, click the Create button. The new zone is created with the appropriate name server (NS) records, and the Zone SOA Panel displays.
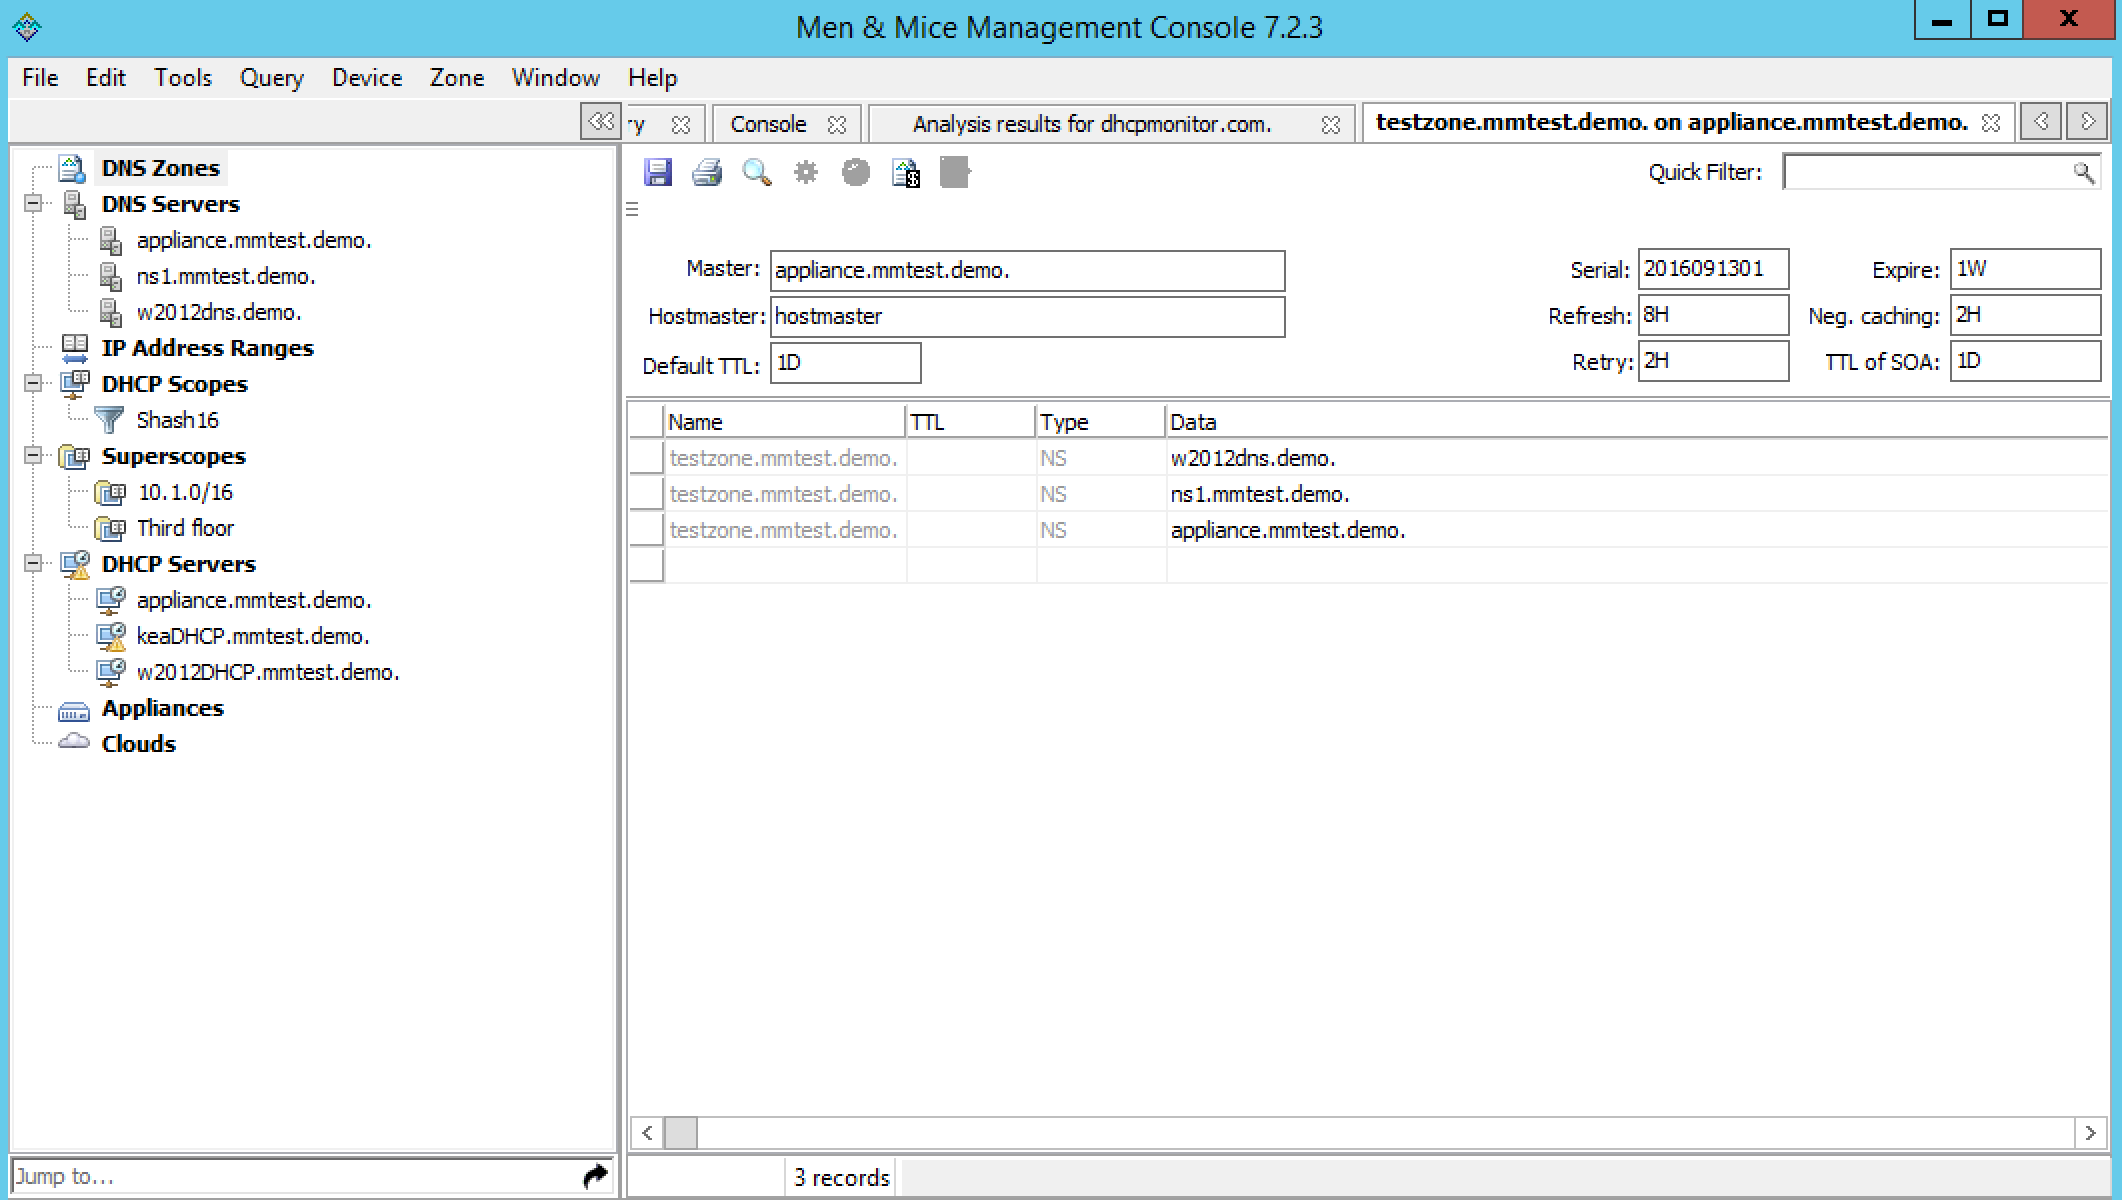
Make any desired changes to the data shown.
When all selections/entries are made, click Save.